
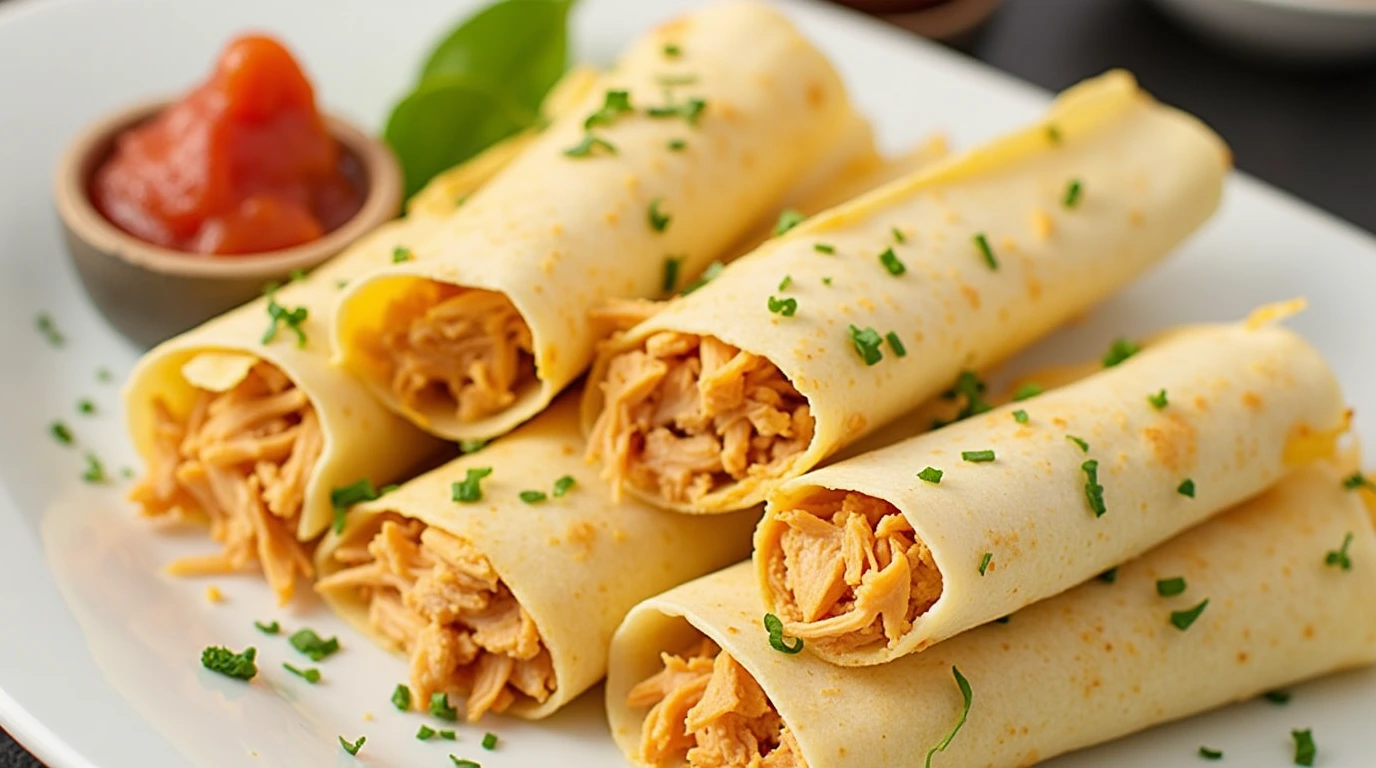
Crispy & Cheesy Chicken Taquitos – A Fun and Flavorful Snack!
Imagine biting into a crunchy, golden tortilla filled with juicy, flavorful chicken and melty cheese. 🤤 Sounds incredible, right? Well, that’s exactly what you get with these crispy and cheesy chicken taquitos! They are super easy to make, incredibly delicious, and perfect for any occasion. Whether you need a quick lunch, a fun party appetizer, or even a light dinner, these taquitos have you covered! 🌮✨
First, they come together with just a few simple ingredients you probably already have. Next, they bake up crispy in the oven – no deep frying required! Plus, they are packed with so much flavor that you’ll find yourself making them again and again. What’s more, they are kid-friendly, freezer-friendly, and just downright irresistible. 🤩
So, grab your tortillas, gather your ingredients, and let’s roll! Keep reading for step-by-step instructions, fun variations, and pro tips to make your taquitos extra special! 👩🍳🔥
Table of Contents

Easy Chicken Taquitos
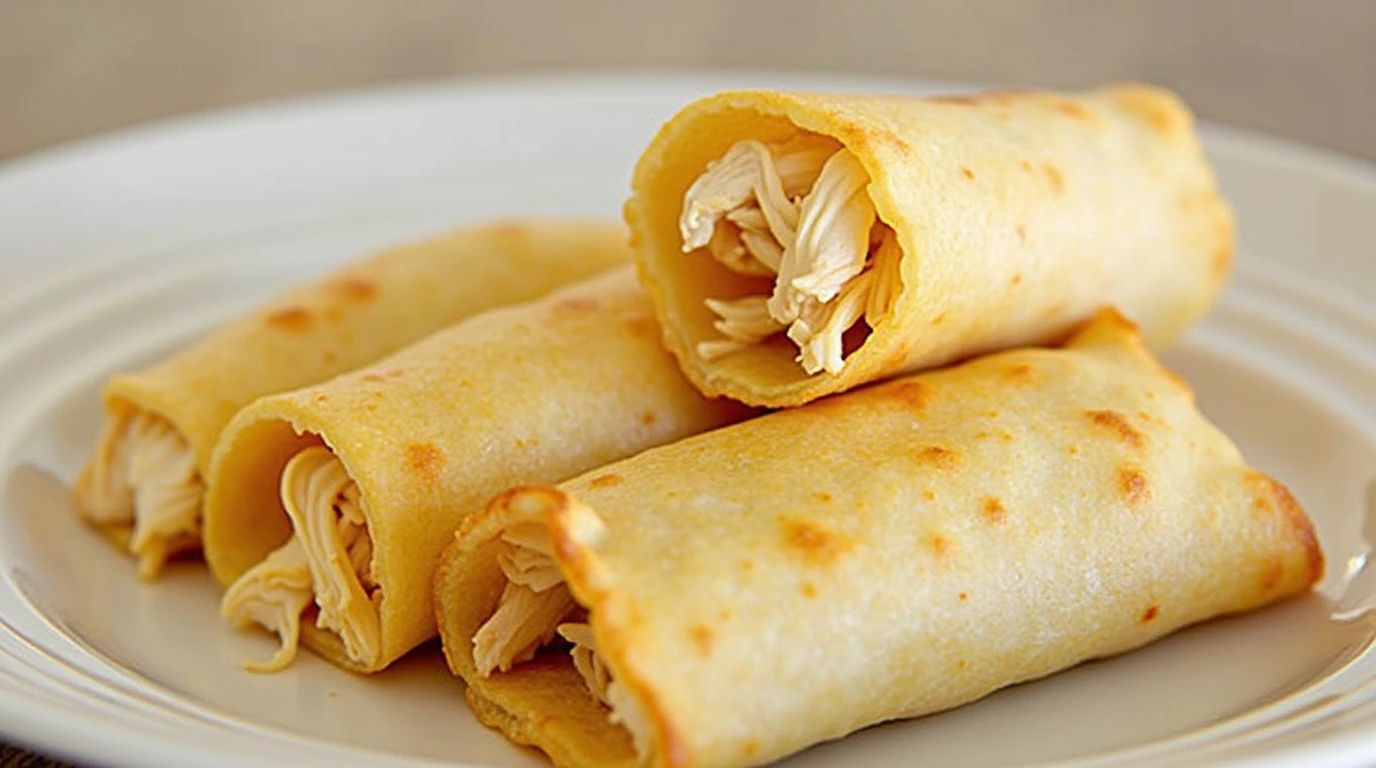
Ohhh, you’re going to LOVE this! 😍 Crispy, golden, and packed with flavor, these easy chicken taquitos are a dream come true! 🌮✨ They’re crunchy on the outside, juicy on the inside, and seriously addictive. First, imagine biting into that crispy shell—oh yeah, that’s the good stuff! 🤤 Then, you get that flavorful, tender chicken with just the right spices. YUM! Whether you’re making them for a party, a quick weeknight dinner, or just because you need some crispy deliciousness in your life—trust me, these will be your new obsession! 💃🔥
-
Prep Time:
10 minutes -
Cook Time:
8 minutes -
Total Time:
18 minutes -
Yield:
12 taquitos

Ingredients
- 2 cups shredded cooked chicken
- 1 cup shredded cheese (cheddar, Monterey Jack, or a mix!)
- 1/2 teaspoon garlic powder
- 1/2 teaspoon onion powder
- 1/2 teaspoon chili powder
- 1/2 teaspoon cumin
- 1/2 teaspoon salt
- 12 small corn tortillas
- Cooking spray or oil for frying
Instructions
- First, preheat your air fryer to 375°F (190°C). This helps get that perfect crispy crunch! 😋
- Next, in a bowl, mix shredded chicken, cheese, and all those delicious spices! Stir it up until everything is coated in flavor! 🌟
- Then, warm your tortillas for a few seconds so they don’t crack when rolling. Trust me, it makes life easier! 🌮🔥
- After that, place a spoonful of the chicken mixture onto each tortilla and roll them up tightly! Secure with a toothpick if needed.
- Now, lightly spray them with oil and pop them into the air fryer! Cook for about 8 minutes, flipping halfway through, until they’re golden brown and crispy! ✨
- Finally, remove and let them cool for a minute—if you can wait that long! Serve with guacamole, salsa, or sour cream, and enjoy every crunchy bite! 😍
Crispy & Delicious Taquitos in No Time!
Who’s ready for a super crispy, flavor-packed bite? 😍✨ These easy chicken taquitos are an absolute dream! 🌮🔥 In just a few steps, you’ll have a batch of crunchy, golden perfection that’ll have everyone reaching for more! 😉 So, let’s dive in and make some magic! ✨🥳
Why You’ll Love This Recipe! 💛
First, it’s quick! ⏳ No need to spend hours in the kitchen. Then, it’s packed with bold, cheesy flavors 🧀🔥. What’s more, you can make it in the oven or air fryer for that perfect crisp! 🍗💨 And lastly, it’s a total crowd-pleaser! 🎉 Perfect for family dinners, game nights, or just because! 🥳
How to Get That Perfect Crunch? 🤩
Now, let’s talk crunch! 🤤 The secret? Rolling your tortillas tightly and brushing them lightly with oil. 🫒✨ Then, you just bake or air fry them until they’re golden brown and crispy! 💛🥹 Oh, and don’t forget your favorite dips – salsa, guac, or sour cream make these even more irresistible! 🥑🍅🥣
Serving Up Pure Happiness! 🌮💛
Imagine this – a plate full of easy chicken taquitos, golden and crispy, served with your favorite dips. 🤤✨ It’s the kind of meal that just makes you smile! 😍💛 So, what are you waiting for? Grab your ingredients, and let’s get rolling! 🎉🔥
Nutrition
- Serving Size:1 taquito
- Calories:210
- Sugar:1.2 g
- Sodium:345 mg
- Fat:8.9 g
- Saturated Fat:2.3 g
- Carbohydrates:24.5 g
- Fiber:2.1 g
- Protein:11.7 g
- Cholesterol:29 mg
FAQs ❓
Do you peel plums before baking?
It depends on how you’re using them. When making jelly or jam, yes you should peel plums. When making this recipe, or other recipes where you roast or bake plums, leave the skin on. They add nice color and shape, plus a bit of tartness that contrasts nicely with the sweetness of the plum flesh.
What is the difference between a tart and a plum galette with puff pastry?
I took a few liberties in naming this plum dessert a “tart.” Mine is actually not really a tart or a galette. Technically, tarts are baked in a very specific style pan (a tart pan) while a galette is a French pastry that’s basically a freeform pie. For a galette, pie crust is rolled flat, filled with lots of fresh fruit (sliced or chopped) then the edges of the crust are folded over the edge of the fruit, overlapping around 1 inch. My tarts are freeform, but with a thinner, puff pastry crust instead of a pie crust. In addition, mine don’t have as much fruit as a typical galette, and the edge of the crust isn’t folded on top of the fruit.
How do you keep the bottom of mini plum tarts from getting soggy?
I’ve never had an issue with these tarts getting soggy. Don’t make them more than 8 hours ahead and make sure to cook them until the crust is crispy.
Try These Other Recipes!

Recipe by Jound
25 mins
Recipe by Jound
15 mins
Recipe by Jound
25 mins
Recipe by Jound
30 mins